JSON Web Token и Secure Sockets Layer
Для начала разберем небольшую задачу. Она поможет читателю получить представление об основах шифрования.
Представим, что у нас есть сундук с важными документами. Мы хотим отправить его из пункта А в пункт Б, но так, чтобы никто не мог открыть его содержимое по пути следования. На сундук можно повесить замок/замки, отправлять сундук несколько раз, принимать обратно, передавать ключ/ключи через посредника. Посредник может скопировать ключ или даже сам сундук, подобно файлам на компьютере. Как же выстроить цепочку передачи, чтобы посредник не получил доступ к закрытым документам при перевозке?
Прежде чем прочитать правильный ответ, подумайте самостоятельно:
Вариант 1
В пункте А вешаем замок и отправляем в пункт Б.
В пункте Б вешаем еще один замок и отправляем обратно в пункт А.
В пункте А открываем замок который изначально повешали в пункте А и возвращаем в пункт Б.
В пункте Б открываем второй замок, извлекаем содержимое.
Данное решение является верным, но нерентабельным, нужно тратить много времени на перевозку, выполняя двойную работу.
Избегаем лишних «движений»
Вариант 2
Из пункта А отправляем замок без ключа.
В пункте Б у нас есть замок и два комплекта ключей. Один из них положим в сундук и закроем на замок, который получили из пункта А. Затем возвращаем обратно в пункт А.
Получаем сундук в пункте А, открываем замок и достаем ключ.
Готово! Теперь в пунктах А и Б есть одинаковые ключи, и можно обмениваться данными, используя один замок.
По ходу повествования читатель поймет необходимость данного примера. А сейчас немного про шифрование.
Шифрование
Выделяют 2 типа шифрования: симметричное и асимметричное.
Симметричное шифрование — способ шифрования, в котором для шифрования и дешифрования применяется один и тот же криптографический ключ. Проблемой данного способа является передача ключа. Необходимо исключить возможность кражи при передаче.
Асимметричное шифрование — процесс, при котором для шифрования данных используется публичный ключ, а для дешифровки – приватный.
Вспомним «Вариант 2» задачи в начале статьи.
Когда передаем замок без ключа из пункта А в пункт Б, в пункте Б мы получаем замок (публичный ключ) которым можно только зашифровать, то есть закрыть сундук.
При помощи его в пункте Б шифруем свой ключ (положим один из дубликатов ключей в сундук и закроем замком, который получили из пункта А) отправляем обратно в пункт А.
В пункте А откроем сундук ключом (расшифруем данные приватным ключом).
Теперь в пунктах А и Б есть одинаковые ключи, и можно проводить симметричное шифрование, использовать 1 замок и дубликаты ключей с каждой стороны.
Как работает SSL
Когда пользователь заходит на сайт, устанавливается защищенное ssl соединение. Данная операция будет происходить каждый раз при новом заходе на сайт. При запросе браузер проверяет наличие сертификата у сервера. В ответ сервером отправляется публичный ключ с сертификатом. Браузер осуществляет проверку сертификата в центре сертификации. Если с сертификатом все хорошо генерирует сеансовый ключ, необходимый для симметричного шифрования и для обеспечения сервера копией данного ключа в дальнейшем. Когда сеансовый ключ сгенерирован, браузер зашифровывает его публичным ключом, полученным с сервера, затем отправляет обратно. Сервер расшифровывает сообщение приватным ключом и сохраняет сеансовый. Далее обмен данными происходит с помощью симметричного шифрования с использованием HTTPS.
JWT Описание стандарта. Правила хранения токенов. Способы передачи и проверки подлинности. Роль SSL при передаче данных.
JWT (JSON Web Token) — это стандарт, основанный на формате JSON, позволяющий создавать токены доступа, используемые для аутентификации в клиент-серверных приложениях.
JSON Web Token (JWT) — содержит три блока, разделенных точками
token —
header — заголовок,
payload — полезная нагрузка,
signature — подпись.
Header — служебная часть токена. Определяет как обрабатывать полученную информацию
typ — тип токена, например JWT;
alg — алгоритм, использованный для генерации подписи.
Payload — полезная нагрузка
Payload — Любые данные о пользователе, для дальнейшей идентификации
Список стандартных данных для payload:
Если необходимо ограничить токен по времени, поле exp или iat обязательно. По ним система проверяет актуальность токена.
Signature — сумма header + payload, зашифрованных определенным образом.
header и payload кодируются при помощи алгоритма base64url, затем объединяются
в единую строку с использованием точки («.») и шифруются алгоритмом с использованием секретного ключа.
Собранный токен
Проверка JWT токена на подлинность
Создаем сигнатуру из header и payload
сравниваем получившиеся сигнатуру с сигнатурой из токена:
Аутентификация по JWT
В системах аутентификации, основанных на JWT, после прохождения аутентификации пользователь получает два токена:
Access token — для авторизации и идентификации пользователя.
Refresh token — для обновления access token.
Access token ограничен по времени жизни (например, 10 минут). Refresh token действителен дольше, например, месяц или неделю. Refresh token необходим для обновления access token. При истечении срока refresh token пользователь заново проходит процедуру аутентификации.
После получения токенов при последующих обращениях access токен передается приложению в заголовке запроса от пользователя
Получив токен от пользователя, приложение проверит его подпись и актуальность. Убедившись в действительности и не истекшем сроке жизни токена, приложение авторизует его используя данные из токена. Если на одном из этапов произошла ошибка, приложение вернет ошибку с кодом «401».
При получении ошибки «401» пользователю необходимо обновить access с помощью refresh токена, отправив запрос по api. Например, api/refresh. В ответ получаем новую пару access и refresh токена. После повторно отправляем изначальный запрос.
Где хранить токены
Представим ситуацию: пользователь авторизовался и получил 2 токена:
access — живет 3 мин;
refresh мы сохраняем в cookie пользователя.
access держим в памяти, и при каждом обновлении страницы, выполняем запрос refresh для получения новой пары такенов. Либо есть вариант когда мы записываем access в cookie.
Не стоит хранить access или refresh токен в localstore, это не безопасно.
Устанавливаем заголовки для set-cookie:
sameSite: true, SameSite=strict (для предотвращения CSRF-атак)
secure: true, разрешает обмен только по https (ssl) и предотвращает перехват access токена
Для refresh cookie
httpOnly: true, запрет чтения/записи данных Cookie посредством JavaScript для refresh
path: равный пути, по которому осуществляется получение новой пары access и refresh токенов. Например (api/refresh)
Для отправки access на сервер вижу 2 варианта
1) При каждом запросе пользователя, будь то получение или изменение каких-либо данных, отправляется заголовок
если в данном варианте токен храним в cookie, а не в памяти, то httpOnly будет равен false, чтобы с помощью js было возможным записать заголовок. рекомендую в данном случае использовать память.
2) Хранить и передавать access токен в cookie с httpOnly = true, тогда нам не придется использовать для этого заголовок (что не является обязательным). httpOnly = true является более безопасным вариантом
Внимание! Не отправляйте refresh токен в cookie на сервер
Https (SSL) вас защитит, так как данные передаются в шифрованном виде, но данный подход не совсем верный, так как при изменении https на http появляется уязвимость. Вдобавок использование двух токенов теряет смысл.
При получении и записи cookie с refresh токеном у нее должен быть указать path равный url, по которому мы обновляем токены ‘api/refresh’. Так мы исключаем отправку refresh токена в других запросах. Это защищает от перехвата обоих токенов и бесконечного обновления access.
Если же мы будем передавать 2 токена и выполнять refresh на сервере при возникновении кражи можно бесконечно выполнять refresh с учетом того что пользователь не будет заходить на сайт. При входе пользователь перелогиниться и получит новую пару. Злоумышленник утратит возможность использовать токены.
Перехват токена
Если злоумышленник получит токен, то сможет декодировать его, используя функцию base64UrlDecode.
Для предотвращения угроз рекомендуется:
использовать защищенное соединение при передаче токенов;
не использовать в токене секретную информацию о пользователе;
для передачи токенов использовать https (ssl);
использовать ограниченное время жизни токенов;
не передавайте access и refresh токены вместе. При хранении токенов в cookie, нужно вырезать рефреш при отправке.
Если у злоумышленника окажется оба токена: refresh и access, он сможет выполнять refresh и обновлять их бесконечно. Наш аccess станет недействительным, и придется сделать logout. В противном случае это сделает приложение. После выполняется login, происходит получение новой пары refresh и access. Злоумышленник больше не сможет использовать токены. Это одно из преимуществ данной технологии.
Подбор ключа
При использовании шифрования алгоритмом HS256 мы используем секретный ключ. Злоумышленник может узнать наш ключ с помощью подбора.
Рекомендации для защиты от атаки подбора ключей:
SECRET_KEY — рекомендуется хранить в env переменных;
Использовать ключ большой длины: большие и малые буквы, цифры и спецсимволы;
Периодическая смена ключа. При такой процедуре пользователю придется заново проходить процедуру аутентификации, но это поможет сделать систему более безопасной.
Главная проблема LocalStorage
Не храните jwt в локальном хранилище, js скрипты на нашем сайте легко могут получить данные из LocalStorage нашего приложения, у локального хранилища нет никаких способов защиты, то есть если мы храним секретные данные в локальном хранилище, информация доступна всем.
Пример инъекции в js
Допустим, у нас на сайте есть скрипт
Скрипт является взломанным и несет в себе вредоносный код, который прочитывает все данные в локальном хранилище и отправляет на сервер для сбора украденной информации. Используя внешние скрипты на сайте, мы всегда рискуем. То же самое касается и установки пакетов через npm или yarn: нет уверенности в их безопасности. Даже сам автор скрипта/плагина может использовать вредоносный код.
Альтернативы локальному хранилищу
Куки
httpOnly — запретит js читать данные из cookie.
SameSite=strict для предотвращения CSRF-атак, а также флаг.
Secure=true — передача только по https
Сессии
Используйте серверную сессию для хранения секретных данных.
Заключение
SSL — стандарт нашего времени. Браузеры запрещают посещение ресурсов без этого протокола.
JSON Web Tokens — популярная технология. При правильном использовании JWT избавляет от ошибки недостаточной авторизации, позволяет быстро распределять информационные потоки между сервисами, с едиными учетными данными и повысить их производительность.
How to Validate a JWT Access Token
In a world where single-page apps (SPAs) and APIs are becoming increasingly popular, authorization is becoming increasingly difficult.
In the past, developers commonly handled API authorization via API keys. API callers would send the API key with each request, and the API receiving the request would look up the key to ensure the caller had permission to access the resource they had requested.
API keys have disadvantages, however.
First, they’re vulnerable to data breaches. They typically don’t expire, so attackers can fraudulently use stolen API keys to access APIs.
Even worse, API key compromises often occur even without a known data breach. If they’re sent as part of an unencrypted HTTP request — or obtained via a Man-in-the-middle attack on an HTTPS request — an attacker can obtain a copy of the key without anyone realizing it.
Also, API keys usually require extra database lookups. When an API receives a request with an API key, it must load the user and roles associated with the key and ensure the user has permission to access the requested resource.
There must be a better way.
A Note on API Authorization Servers
You can configure an OIDC app to behave as a simple authorization (“authz”) and authentication (“authn”) mechanism, allowing your application access to standard identity information, but you can also connect any OIDC app to an API Authorization Server configuration. This allows greater control over the content of the access tokens themselves.
When appropriate we will call out any differences you might see when an access token is requested in a basic OIDC flow versus in a flow against an API Authorization Server-enabled OIDC app.
JSON Web Tokens
JSON Web Tokens (JWTs) are one solution to the drawbacks of API keys. JWTs offer a standardized way of securely storing and sharing data in JSON format. Each JWT is cryptographically signed, so it’s easy to verify that it is legitimate. An API user can’t just make up their own JWT and use it to access the API because that user won’t have access to the secret key used to generate the correct JWT signature.
JWTs contain three parts:
- header
- payload
- signature
Each piece of the JWT is base-64 encoded separately, and then all three elements are joined by a dot to form a single string. A token’s payload contains a JSON object, and each of the object’s properties is called a claim.
While you can roll your own JWT generation and verification infrastructure, it’s usually best to leave security to the experts. That’s where OneLogin comes in. OneLogin is a cloud-based identity and access provider that can handle all of your application’s authentication needs — including generating JWTs and verifying their signatures.
But even when a JWT’s signature is valid, it’s still important to perform additional validation to ensure that the token isn’t expired and grants access to the requested resource(s).
This article will examine the steps needed to validate a OneLogin JWT access token in Node.js.
Obtaining a JWT with OneLogin
Before we can validate a JWT, we must first obtain a JWT. Fortunately, OneLogin makes that easy.
In a typical application, users will authenticate with OneLogin and receive a JWT that grants them access to your API. To keep things simple, we’re going to use OneLogin’s Node.js sample code as a base. This approach simulates the way we’d use JWTs in a real-world web application.
Start by creating an OpenID Connect (OIDC) application in the OneLogin portal. To get the code up and running, follow the instructions on this page, with a couple of small changes:
- After creating the OIDC application, set the callback URI to http://localhost:3000/oauth/callback .
- In the .env file of the Node.js project, set the SUBDOMAIN variable to match the subdomain you chose when you created your OneLogin account.
Note that our application is using the standard OIDC Authorization Code flow to obtain an access token. While this flow is very secure, it requires your OIDC application’s client secret, so you can only use it when you’re working on a web application with a back end you control. If you’re working with an app where you don’t control the back end, you should instead use the Implicit flow (for web apps) or Authorization code with PKCE (for native desktop and mobile apps) to obtain an access token.
Next, run npm install to download all of the project’s dependencies.
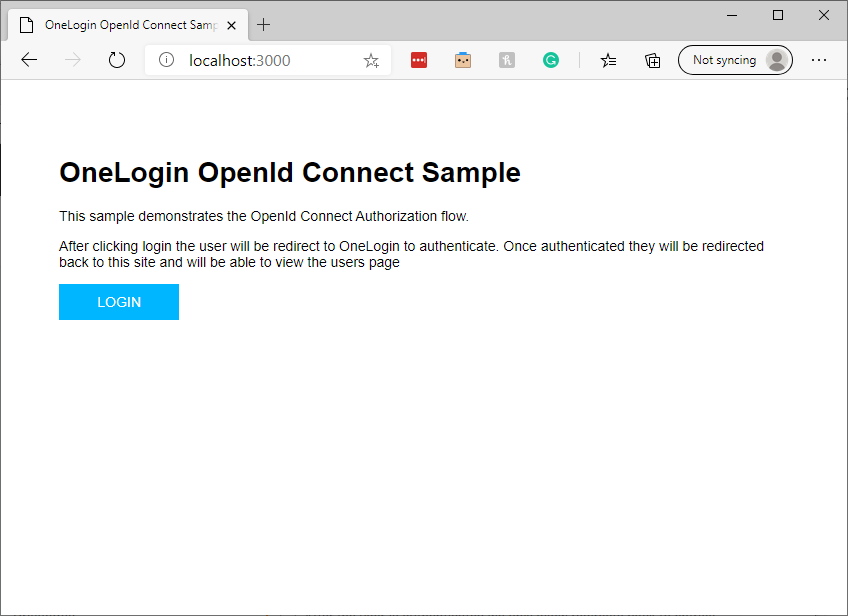
The project you’ve just set up is a straightforward Express.js application that uses Passport.js to integrate with OneLogin OpenID applications. To see it in action, run npm run start from the project directory. Then, open http://localhost:3000 in a web browser. You’ll see an application that lets you log in using OneLogin:
After login, you’ll see a simple main menu:
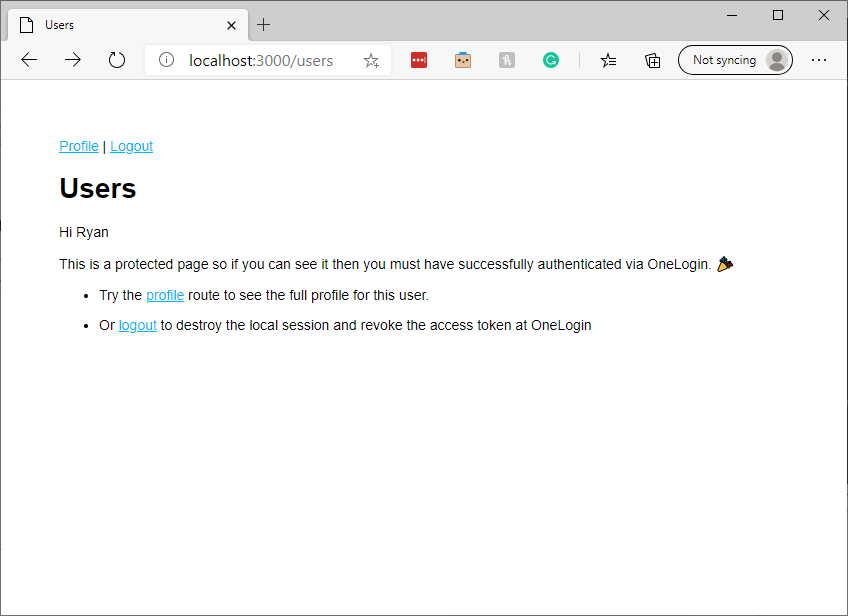
We’re going to add a token page under the users route to make it easy to acquire and inspect a JWT token.
Let’s begin by adding a new route to routes/users.js :
To inspect a JWT token, we must first obtain one. Fortunately, OneLogin’s sample app provides it. Once a user has logged in to the Express app, it stores a copy of the access token we need.
We can access it inside any Express request via the req.session.accessToken variable. We must send the access token to the OneLogin OIDC app’s introspection endpoint to validate the token.
If the token is valid, the introspection endpoint will respond with an HTTP 200 response code. The body of the response will also contain an augmented version of the original JWT token’s payload.
To start the validation process, add the following code inside the route function we create above in the users.js file:
This code creates an HTTP POST request to OneLogin’s token introspection endpoint.
The introspection endpoint requires four parameters:
- The token we’d like to validate
- A token type hint
- The OIDC application’s client ID
- The application’s client secret
We retrieve the user’s access token from Express’s session, set the token type hint to ‘access_token’ since that is the type of token we are sending, and we read the OIDC client ID from the app’s environment variables.
The endpoint expects the POST body to be in a URL-encoded form format. The request library accepts the form parameters as a JavaScript object and handles the encoding for us.
If we’ve supplied valid data to the token introspection endpoint, the body parameter of the callback function will contain a string holding a JSON object that looks similar to this:
Above, we see the signed-in user’s JWT token. The data returned by OneLogin only includes the token payload. We’d have to separate the token’s payload from its header and decrypt it if we had rolled our own JWT implementation. Fortunately, OneLogin has done the hard work for us.
OneLogin has altered the data slightly: the signed-in user’s access token would have stored the client ID in the JWT aud (audience) claim. OneLogin’s response also adds an active claim indicating whether the user is currently signed into OneLogin.
Note that decoding a JWT via the introspection as we’ve done here is convenient, but not very efficient. In a backend web API, we wouldn’t want to call our OneLogin OIDC app’s introspection endpoint on every call our API receives. Instead, we could use a JWT library that loads and caches our OIDC app’s JSON Web Key Set (JWKS) uses it to verify the token’s authenticity, and then base64-decodes it so we can validate its fields.
Understanding JWT Claims
Let’s start by looking at the client_id claim. In OneLogin-generated JWT tokens, the aud and client_id claims should equal the client ID of the OIDC app that generated the token. In access tokens generated by authorization servers created via OneLogin’s API Authorization API, the aud claim should contain the base URL that was provided when creating the authorization server.
In the route added above, add the following code to parse the token payload out of the response body and set up a variable to track whether our token is valid.:
Next, add a line to make sure the client ID is correct:
Then we must ensure the token hasn’t expired. A JWT token’s “exp” claim holds its expiry time. This claim is formatted as a Unix Timestamp — the number of seconds elapsed since the beginning of January 1, 1970, UTC.
We start by storing the current date and time in Unix timestamp format. The getTime method of JavaScript’s Date object almost gives us what we need, but provides the count in milliseconds instead of seconds. Dividing by 1000 turns it into a valid Unix timestamp.
We then check that the token hasn’t expired by verifying that the exp claim’s value is greater than the current time.
Finally, check that the JWT includes a scope indicating that the user is authorized to make the request they’re making. OneLogin API Authorization servers contain a list of scopes that can be added to tokens requested from it.
For example, an authorization server for a blogging app might add scopes such as post:create , post:edit , and post:delete . In this case, if a user asked your API to delete a blog post, you’d want to verify that their JWT token contains the post:delete claim. In our sample endpoint, the code to check for this scope might look like:
In the end, our final token validation route looks like this:
Note that the code above contains some commented-out samples to demonstrate how you’d check for a specific scope in a real application.
Next Steps
And we’re done! Without much code, we’ve learned how to check the validity of the claims you can expect to find in a typical JWT token.
If you’re developing a web app or API, you know that authentication and authorization are pain points that distract you from delighting your users. Why not let OneLogin handle it for you so you can focus on all the other problems you need to solve? Get started today with a developer account.
How To Validate a JWT Token

JWT stands for JSON Web Token. It is a security validation mechanism widely used now a day. JWT is basically a string of random alphanumeric characters. There are three parts of a JWT separated by dots, header, payload, and signature. A JWT looks like this
What do I need to validate?
You see why it’s called JSON web token. It is composed of JSON objects, which are base64url-encoded and joined together as a string separated by dots. Anyone in possession of JWT can decode it and see the content. JWT tokens are digitally signed (the signature part) using the payload content and a secret key. In order to change the content, the secret key is required to generate the signature again, otherwise, the signature will be invalid. When a token is posted to the server, it must be validated to check if anyone has tempered the token or not. Lack of proper validation can cause serious security issues and here we will see how to properly validate a JWT.
In order to validate a JWT, you must know the content of JWT.
Header
The contents of the Header describe the cryptographic operations to the JWT data. This means that the header contains the information about the type of the token and the algorithm used to generate the signature (yes there are more than one and we will discuss most commonly used). So in the example header, we have a JSON object which contains a type property ‘typ’ and the algorithm property ‘alg’ whose value is the algorithm used to generate the signature. They type property says that it is a JWT token, which is our very first check to validate if the value is JWT or something else. This property is optional but since we are discussing all the possible options to be secure, we can check if this property is available, its value should be JWT. Another property “cty” (content type) is used to convey structural information about the JWT.
Payload
The payload is the central part of the JWT which contains verifiable security statements, such as the identity of the user and the permissions they are allowed. The payload information is also referred to as Claims. There are three classes of JWT Claim Names:
1. Registered Claim Names
2. Public Claim Names
3. Private Claim Names
Registered claims are the predefined claims. Public claims can be any user defines information and private claims are the ones upon which producer and consumer of JWT are agreed to use some special or private claims.
In order to validate a JWT, we should check some registered claims as well. Some of the important registered claims are defined below.
“iss” (Issuer) Claim
The "iss" (issuer) claim identifies the principal that issued the JWT. The processing of this claim is generally application specific. The "iss" value is a case-sensitive string containing a URI value. The use of this claim is OPTIONAL. We should validate that the issuer is a valid URL or JWT is sent by out expected issuer.
"sub" (Subject) Claim
The "sub" (subject) claim identifies the principal that is the subject of the JWT. The claims in a JWT are normally statements about the subject. The "sub" value is a case-sensitive string containing a URI value. The use of this claim is OPTIONAL.
"aud" (Audience) Claim
The "aud" (audience) claim identifies the recipients that the JWT is intended for. Each principal intended to process the JWT MUST identify itself with a value in the audience claim. If the principal processing the claim does not identify itself with a value in the "aud" claim when this claim is present, then the JWT MUST be rejected. In the general case, the "aud" value is an array of case-sensitive strings, each containing a URI value. The use of this claim is OPTIONAL.
"exp" (Expiration Time) Claim
The "exp" (expiration time) claim identifies the expiration time on or after which the JWT MUST NOT be accepted for processing. The processing of the "exp" claim requires that the current date/time MUST be before the expiration date/time listed in the "exp" claim. Its value MUST be a number containing a timestamp value. The use of this claim is OPTIONAL.
"nbf" (Not Before) Claim
The "nbf" (not before) claim identifies the time before which the JWT MUST NOT be accepted for processing. The processing of the "nbf" claim requires that the current date/time MUST be after or equal to the not-before date/time listed in the "nbf" claim. Its value MUST be a number containing a Numeric Date value. The use of this claim is OPTIONAL.
"iat" (Issued At) Claim
The "iat" (issued at) claim identifies the time at which the JWT was issued. This claim can be used to determine the age of the JWT. Its value MUST be a number containing Numeric Date value. The use of this claim is OPTIONAL.
"jti" (JWT ID) Claim
The "jti" (JWT ID) claim provides a unique identifier for the JWT. The identifier value MUST be assigned in a manner that ensures that there is a negligible probability that the same value will be accidentally assigned to a different data object; if the application uses multiple issuers, collisions MUST be prevented among values produced by different issuers as well. The "jti" claim can be used to prevent the JWT from being replayed. The "jti" value is a case sensitive string. The use of this claim is OPTIONAL.
Signature
The third part of JWT is the signature. This is the most important part of JWT validation. As we have already seen that signature is generated using payload and a secret key, anyone who is in possession of this key can generate new tokens with valid signatures. you have to be sure that the data in that payload is legitimate and can be trusted (at least as much as you are sure your secret key is really secret).
Most commonly used crypto algorithms used for generating signature are
· HS256 algorithm, which is short for HMAC-SHA256
· RS256 signing algorithm, which is short for RSA-SHA256
HS256 (Symmetric Key encryption) involves a secret key that is shared between two parties. This secret key is used to encrypt the data and on the receiving end, the same key is used to decrypt the data. HS256 signatures are generated using a secret key which is validated at the receiving end (resource server). On the receiving end, using the payload and secret key signature are generated again and compared to the incoming signature part of the JWT. As only the authentication server and the resources server are in possession of the secret key, it is not possible to temper the JWT token, and that’s how we can check the validity of the JWT token.
Something is wrong here
A disadvantage of the HS256 algorithm is that the secret key needs to be accessible both when generating and validating tokens. For a monolithic application, this isn’t so much of a problem, but if you have a distributed system built out of multiple services running independently of each other or same cloud environment having multiple application nodes, you basically have to choose between two really bad options:
- You can opt to have a dedicated service for token generation and verification. Any services that receive a token from a client need to make a call into the authentication service to have the token verified. For busy systems this creates a performance bottleneck on the authentication service.
- You can configure the secret key into all the services that receive tokens from clients so that they can verify the tokens without having to make a call to the authentication service. But having the secret key in multiple locations increases the risk of it being compromised, and once it is compromised the attacker can generate valid tokens and impersonate any user in the system.
RS256 (Asymmetric Key encryption or Public Key encryption) involves two keys, a public key, and a private key. The private key is used to generate the signature whereas the public key is used to validate the signature. In this case the private key is only in possession of the authentication server who has generated the JWT token and we no longer need to distribute the private key. On the resource server we can validate the token by using the public key. Both keys are non-interchangeable, one can only be used to generate and other can only be used for validation.
JSON Web Key Set (JWKS)
One question arises that how we can get the public key. The JSON Web Key Set (JWKS) is a set of keys that contains the public keys used to verify any JSON Web Token (JWT) issued by the authorization. Most authorization servers expose a discovery endpoint, like https://YOUR_DOMAIN/.well-known/openid-configuration . You can use this endpoint to configure your application or API to automatically locate the JSON Web key set endpoint ( jwks_uri ), which contains the public key used to sign the JWT .
Be more secure
By applying all these things, your web security is rock solid. Here are some extra tips which you can apply to be more secure.
- Verify that the JWT contains at least one period ('.') character.
- Let the Encoded Header be the portion of the JWT before the first period ('.') character.
- Base64url decode the Encoded Header following the restriction that no line breaks, whitespace, or other additional characters have been used.
- Verify that the resulting octet sequence is a UTF-8-encoded of a completely valid JSON.
Finally, note that it is an application decision in which algorithms may be used in a given context. Even if a JWT can be successfully validated, unless the algorithms used in the JWT are acceptable to the application, it SHOULD reject the JWT.
How to validate a JWT token
I’m trying to use JWT tokens. I managed to generate a valid JWTTokenString and validated it on the JWT debugger but I’m having an impossible time validating the token in .Net. Here’s the code I have so far:
All I want is a function that receives a token and returns true or false based on its validity. From research I’ve seen people use IssuerSigningToken to assign the validation key. But when I try to use it, it doesn’t seem to exist. Could anyone give me a hand on validating the token?
4 Answers 4
You must use the same key to validate the token as the one you use to generate it. Also you need to disable some validations such as expiration, issuer and audiance, because the token you generate doesn’t have these information (or you can add these information). Here’s a working example: